Mom’s Decadent Peanut Butter Pie Mini Mason Jars


My mom makes a version of this recipe for my birthday every year. We used to go to a restaurant in Pa called Rachel’s which this pie tastes just like.  My birthday is coming up and I no longer live close to home so I decided to make it for myself this year. I did not end up making the crust she generally makes a oatmeal no bake crust.  You can shave some chocolate on the top or place some roasted chopped peanuts for an added texture & topping.  I prefer to place it in portion controlled contains so I do not eat the whole thing. Also this way you can share to many or have a dinner party and everyone will love the fact you made them their own personal dessert. My boyfriend and I started doing mason jars desserts during covid to avoid multiple people touching or breathing around desserts.

Ingredients:

1 1/2 cup of Heavy Cream

1 Teaspoon of pure vanilla extract

1/4 cup of granulated sugar

8 ounce of cream cheese (room temperature) 

1 cup of your favorite smooth peanut butter

1 cup of confectionary sugar

—Optional for topping, roasted chopped peanuts, or broken peanut brittle pieces on the top

1. Whip up the first 3 ingredients (heavy cream, extract, granulated sugar) into a mixing bowl with whipping attachment. Whip until peaks form. 

2. In a separate bowl mix together the soft cream cheese, peanut butter, and confectionary sugar until all items are married together (looks similar to frosting consistency). 

3. Fold in the whipped cream until smooth. 

4. Placed the batter in a large sealable ziplock bag, cut a small piece off one the the tips and fill approximately 112g of the filling into each 4 oz mason jar to yield 12 jars, Or divide the batter however you’d like. For best results seal with mason jar lid and place in the refrigerator for 24 hours before you indulge. 


You can make this vegan by using full fat cold coconut milk (canned) & vegan cream cheese. If there is a peanut butter allergy in the family, you can use any smooth nut butter.

To make low carb substitutions would be swerve sweetener granulated sugar (or equivalent ands swerve confectionary sugar replacement equal parts. 

Vacation Shrimp Boil

My family loves to vacation together in Topsail North Carolina. We have been going there since the late nineties. Just recently we started preparing a low-country boil. The tradition started a few years ago with purchasing a pot that a local restaurant would prep for you to take back to the beach house to prepare. This year we bought all the ingredients and made our own (we even brought with us our own 12 qt stock pots. We like to make this the night we all get in to the island since it is minimal prep and time to cook. Plus super easy clean up. Bonus lots of leftovers.42081594-77A1-4D2F-91D4-30A4C5FC50FF_1_201_a


Serves 8-10 (with enough leftovers for a low country shrimp boil salad or frittata the next day)


Ingredients:

1 cup of old bay seasoning, plus more for sauce
3 pounds of small red skin potatoes (cleaned but keep the skin on)
2 pounds of Kielbasa (cut into thick coin slices)
6 Corn on the cobs (cut in half)
3 pounds of shrimp ( in shell)
Ketchup
Horseradish (prepared in jar)

Directions:

1. Add water & old bay to a large pot (or two) and allow to come to a boil.
2. Add potatoes and cook for 5 minutes.
3. Add kielbasa and cook for 12 minutes.
4. Add corn on the cob and boil for 2 minutes.
5. Add shrimp and cook for 2 to 4 minutes until pink.
6. Strain into a cooler or place on newspaper or we used 2 half sheet pans with rack inserts which worked well too.
7. Service with homemade cocktail sauce (mix together horseradish, ketchup, and additional old bay to taste.

Chad’s Versatile Pizza Dough

IMG_4434Chad and I met through yoga teacher training a little over two years ago. During our training we learned we were both passionate about cooking and baking for others. Our love language is doing for others.

A few months after the training Chad was asked to cook for a dinner party for some of the teachers at the yoga studio where we practice.   He asked me to be his sous chef that evening. Looking back now our first date was technically prepping for a dinner party. We made pizzas for a very special birthday for mutual acquaintances and got lost in the evening. We had so much fun in the kitchen cooking up a storm the evening flew by. We prepped the foods together so seamlessly it was love at first bake.

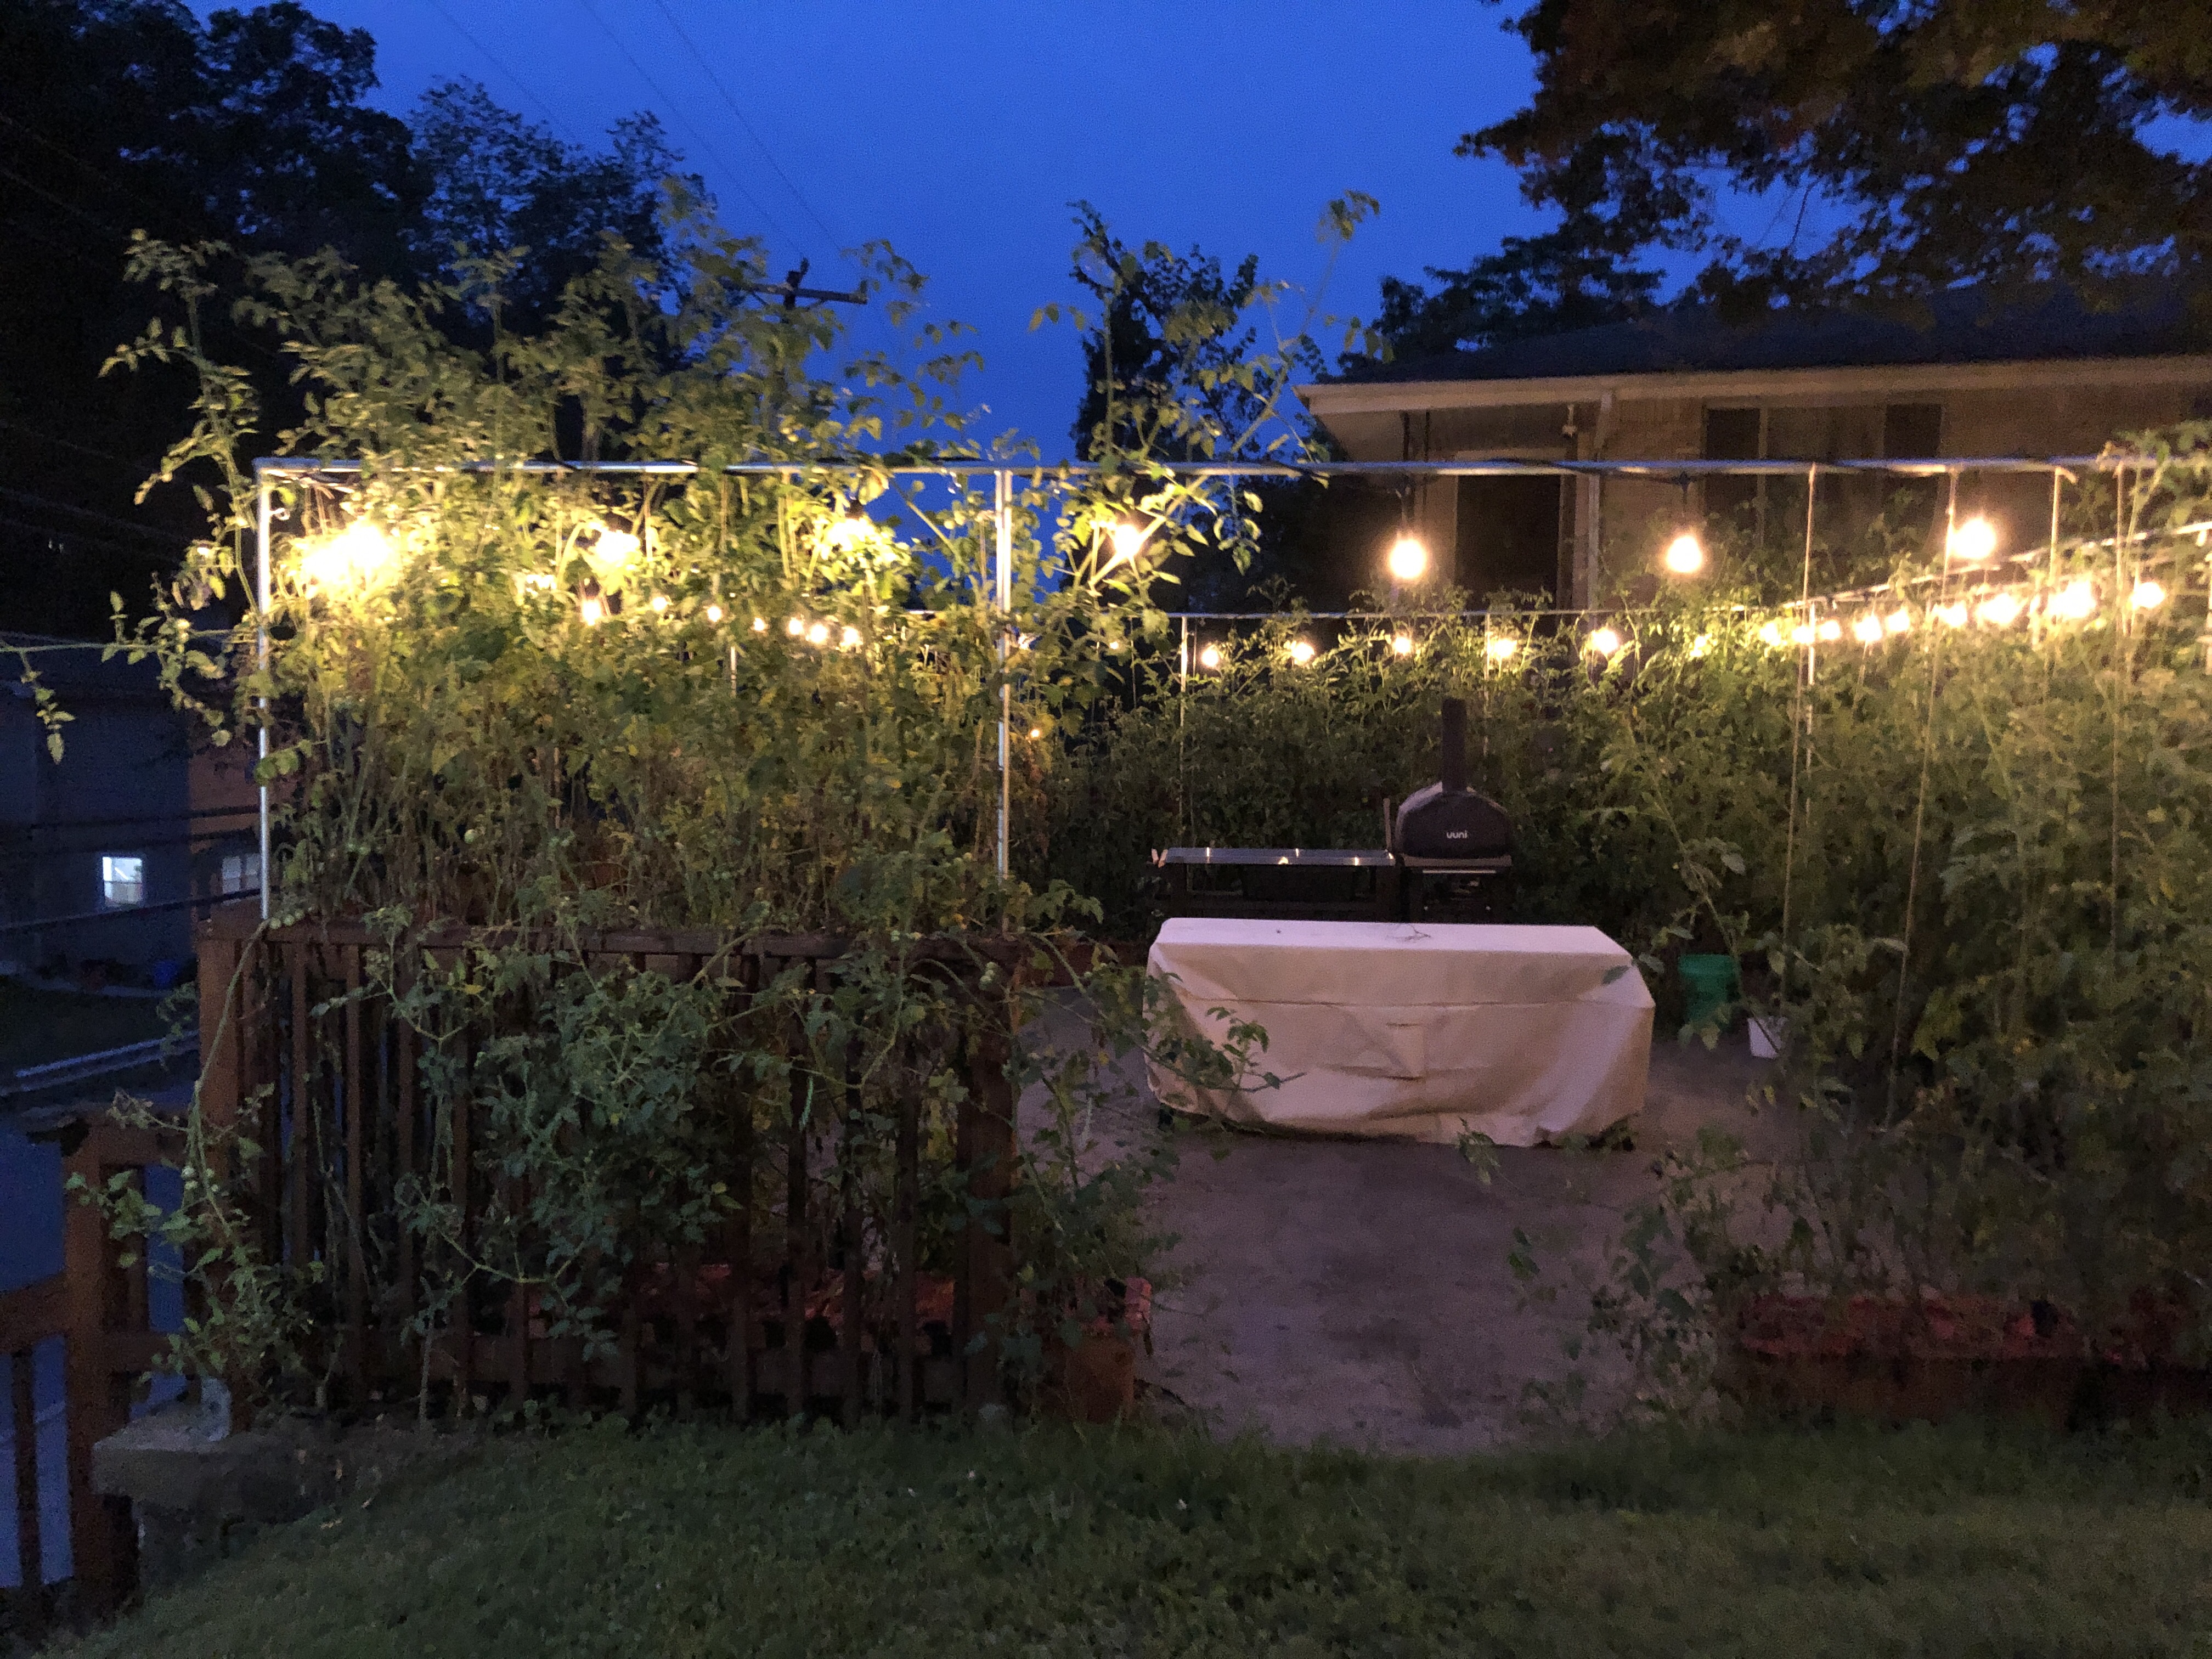
This recipe is our go to recipe for making pizzas in the ooni oven. We have made it for several occasions. Everyone who tries this pizza loves the dough (texture and taste). I cannot help but think a lot of the flavor has to do with the love that goes into the recipe by the happiness that is created in the kitchen when you are having fun and preparing it with and for the ones you love.

This past Christmas we were in a pinch for a quick homemade bread during the holiday so we made this pizza dough recipe for Christmas Eve. It was a success. How awesome!! One recipe two amazing tasty options for baking.

Below you will find the recipe in both weights and cups. I have learned a lot from Chad with cooking with him in the kitchen. He loves to use his scale for measuring out everything. I have found with using this practice I yield a more consistent product every time. Plus I no longer have to count cups. Sometimes when I count several cups of flour or sugar I lose count and have to start all over. Using a scale eliminates this dilemma.

Special note, once you starting using this recipe you may never order take out pizza again!

This recipe below makes 4 pizza dough balls or one large loaf of bread

Ingredients:

2 1/2 cups (342 grams) of bread flour

1 1/2 cup (210 grams) cake flour

1 1/4 cup (296 grams) of warm water (about 90 degrees)

1 tsp ( 4 grams) of yeast

1 tsp (6 grams) kosher salt (diamond)

Directions:

In a small measuring container add the yeast to the warm water, let it set for about 5 minutes or until it blooms. In the meantime, in a stand mixer bowl measure out the flours, and salt. Mix together using dough hook on mixer.

Once the yeast is ready & on a low speed start to add the liquid to the dry ingredients. Slowly increase the speed to medium/medium high. Keep the dough kneading until the dough completely pulls away for the side of the bowl. This can take 6-8 minutes. Once the dough is ready in the stand mixer bowl, form a ball and cover the dough for 90 minutes. I like to place my dough over the radiator heater.

After 90 minutes elapses cut the dough into 4 balls if making pizza. Left each dough rise again for 60 minutes. If you are making pizza after the 60 minutes elapses you can roll out & add your toppings place in preheated oven for 6-8 minutes on a hot pizza stone. I like my oven as hot as it will go so 500 or 550.

Alternative method if you want to make bread:

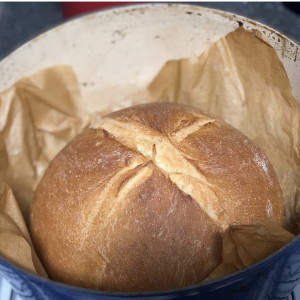
Start to preheat oven to 500 degrees (halfway through the 90 minute mark) and place a large dutch oven in the oven. The dutch oven should be in the oven for 60 minutes prior to baking the bread (which allows the bread to rise again).

After the 90 minutes time is complete place the dough on parchment paper and back into the mixing bowl. Let the dough rise for 60 minutes.

Tip: After the 60 minute time elapses do not divide the dough. Using a sharp knife deeply score the bread you wish. Using the sides of the parchment paper, place the dough in a hot dutch oven. (Use hot hands gloves or good oven mitts to open the lid and insert the dough). You might need a helper.

Place the lid back on the dutch oven. Change the temperature of the oven to 400 degrees. Let the dough bake for 40 minutes. Do not peek. I repeat do not open the oven or dutch oven during the baking time frame. Once the dough is ready take out of oven and open lid of the dutch oven. You can remove the loaf right away (use the parchment paper sides to pull the bread out of the oven) to a bakers rack and allow to cool completely before diving into it.


IMG_6D548955649D-1


Everything Seasoning…Copy that


IMG_2355


Everything seasoning is my new obsession. I have been adding it to everything (No punt intended)! It is all the rage right now. Every store sells their own version. From ALDI to Wegmans to Trader Joes to Costco. Recently my boyfriend and I married our kitchens and spices. Which means it is getting pretty serious (smiles and hearts). With the blending of the two pantries we discovered over 300 spices, grains, and more for our culinary adventures.

Which made me realize, we have a elite pantry but also that I can make my own Everything Seasoning Blend.

I spiced it up a bit with using black Hawaiian Sea Salt and Fleur de Sel; however, use what you have on hand. Mix it up!

Everything Seasoning Ingredients

4 TB poppyseeds

2 TB white sesame seeds

2 TB black sesame seeds

2 TB minced dry garlic

2TB minced dry onion 

2 teaspoon of Black Sea 

2 teaspoons fleur de sel 

Directions: 

Place all the ingredients in a small bowl and mix it up with a spoon, until well blended. Place all the ingredients using a large funnel into a 8 ounce ball jar (fits perfectly in this size here). Secure the lid & shake it up. Sprinkle generously on “Everything”. My favorites are hummus on a whole grain tortilla, winter spaghetti squash, hard boiled eggs, salads, and more.  So much more….

Nitro Cold Brew Coffee

One of my favorite pleasures in this world is nitro cold brew coffee. I fell in love with it in the Strip District several years ago. “We Come from France” is my all time favorite flavor. You can get this beautiful concoction at Allegheny Coffee. The blend is vanilla & creme brûlée 😍. The texture is so creamy, smooth, & milky without any cream added to it. Then on top of all that it is infused with nitrogen. So you can get a keg full of it (and I have!). This addiction can be an expensive habit.

Or my boyfriend Chad can brew you up our blend of the perfect marriage of Peruvian Coffee, which is sweet with chocolate, & nutty smooth accents. We add pure vanilla extract from penzeys and creme brûlée extract to the brew to mimic the coffee house blend. I now prefer our blend compared to Allegheny Coffee’s brew. Bonus we make it decaf due to my desire to lessen my caffeine intake. I am already highly strung. No need for additional caffeine.

Ingredients:

60 grams of high quality ground coffee

4 cups of filtered water

32 ounce size mason jar

Pure vanilla extract taste

Creme brûlée extract to taste

Directions:

1. Place the ground coffee in a large mason jar. Add 4 cups of water.

2. Let the coffee rest on the counter top at room temperature for 12 hours.

3. After the time has elapsed. Strain the coffee through a fine strainer and/or use a coffee filter.

4. Discard the coffee grounds (our plants love the coffee grounds especially the Swedish Ivy). Using a funnel, pour the coffee back into a clean mason jar. Make sure to add additional water back to the strained coffee to equal 4 cups of total liquid. Some of the liquid is lost due to the absorption of the grounds.

5. Place the coffee into a stainless steel whipper add a few drops of vanilla and creme brûlée extract. Place the lid on the whipper and add nitrogen cartridges. Twist to let the gas release, lock, and shake it like a Polaroid picture.

6. For optimal results let the coffee chill for a few hours before adding the nitrogen cartridge.

7. Wait for pure magic to transpire as you pour your first cup. 😋

Roasted Heirloom Tomatoes

Summer time means homegrown tomatoes! Chad and I’s tomato plants are 7 feet tall.

We planted over a hundred plants in the rooftop garden this year. So now that they are ready to be picked we cannot keep up. One of our favorite things to do is slow roast them in the oven (that is when we are not eating them right off the plants!). Yum! We grew a variety of small heirloom plants so many vibrant colors of the rainbow with various flavors and textures.

We also love to give the tomatoes away. We probably give more away than what we keep. Sharing is caring ☺️

Roasting and freezing them help us enjoy them all year round.

This is such a simple recipe! All you need is time.

Ingredients:

  • 1-2 pints of ripe tomatoes (we like to grow the smaller variety)
  • Olive oil or canola oil spray
  • Kosher salt to taste

Directions:

  • Preheat oven to 250 degrees
  • Prepare a 1/2 sheet baking tray with either rack insert or lined silicone mat
  • Wash & rinse the tomatoes with water
  • Cut the tomatoes in half & line them on the sheet pan cut-side down.
  • Place the pan in the oven and let them roast for 2 hours at 250 degrees.
  • Once time has elapsed remove from oven and let cool. Place the tomatoes using a funnel into ball jars. Store in refrigerators.

I love to place this on top of my salad, eggs, or in a wrap with hummus. Or just eat by the spoonful 😋

Lemon and Poppy Seed Cupcakes

IMG_1525


Lemon is very refreshing and pairs well with poppyseeds. I made these for a special birthday treat. Candying the lemon adds a special touch and not to mention looks elegant &  fabulous.

Recipe yields a dozen refreshing cupcakes

Ingredients:

1/ 2 cup plain fat free greek yogurt or vanilla

1 1/2 tablespoons of fresh lemon zest

2 Tablespoons of poppy seeds

1 1/2 cup whole wheat pastry flour

1 cup of AP flour

1/4 teaspoon of baking soda

1/4 teaspoon of kosher salt

1 cup of granulated sugar

1 stick of unsalted butter, softened (room temperature)

3 eggs, room temperature

1 teaspoon of pure vanilla extract (I love penzey’s single strength)

Glaze

  • 1/2 cup of water
  • 1 cup powdered sugar
  •  4 tablespoons fresh lemon juice (about one lemon) Meyer Lemons work well with this if in season. (P.S. I saw them at ADLI the other day)!
  • 1 tablespoon Poppyseeds (optional)

Candied Lemon Slices

  • 1/2 cup granulated sugar
  • 1/2 cup water
  • 2 lemons, sliced 1/8 inch thick, seeds removed

Prework:

  • Preheat the oven to 350°.
  • Place paper liners in your 12 count muffin tin. Set aside.
  • Place a wax paper or parchment paper down under a wire drying rack
Directions:
1. Place poppy seeds, zest, and yogurt in a small bowl. Set aside and allow to rest for 5 minutes.
2. In a separate medium bowl, whisk together the flours, baking soda, baking powder and salt.

3. With an electric mixer on high speed, beat the butter and sugar until light and fluffy, this can take about 4 minutes depending on the softness of your butter. Lower the speed and add one egg at a time, making sure each egg is incorporated into the batter before adding the next. Stir in the vanilla extract.

4. On low speed start to slowly add in the dry ingredients in 3 batches, alternating with 2 batches of the yogurt liquid mixture.

5. Using an ice cream scoop, portion the batter evenly into the prepared liners. Gracefully drop the muffin tin on the counter a few times to free up air bubbles. Place the tin in the center of the oven on middle rack, bake until toothpick comes out clean, about 18-20 minutes. Allow the cupcake to cool in pan for 1 minute. Remove the cupcakes from the tin and place on wire rack to cool completely before finishing with glaze.

6. Once the cupcakes are cooled completely start the glaze. Combine the powdered sugar and lemon juice together in a medium bowl, adding more lemon juice if consistency is too thick. Set aside. If you start this glaze early, You might even want to place plastic wrap on the top until the cupcakes are ready to be garnished.

7.  In the meantime, in a medium saucepan, combine the granulated sugar and the water and bring to a boil, stirring with whisk to dissolve the sugar. Add the lemon slices and allow for rolling boil over medium-low heat for about 8 minutes until slices are translucent, gently  stirring every other minute or so. Turn off the heat and transfer slices to a sheet of waxed paper.

7.  Start to pour the glaze over the cupcakes letting it drip down the sides. Let them set, top each cupcake with one candied lemon slice and a dash of poppyseeds.

Enjoy

Continue reading

Avocado Quick Bread Mini Loaves

IMG_0221


Avocado bread say what? I saw a bread recipe post that inspired me to give avocado bread a try. My sister loves avocados! And I am always trying new recipes with them to fill her love tank. I made mini loaves of the quick bread because it takes less time in the oven and you can share the love of homemade treats a lot further if you make minis vs one large 9 by 5 inch loaf. Also you can make minis in a smaller oven. I have been addicted to using the June oven.  The smaller oven cuts down on energy costs! Which is a double win in my book….Yay!

Bonus: Aldi just had avocados on sale for under a dollar a piece !!

Ingredients:

  • 2 cups of whole wheat pastry flour, I prefer Bob’s Red Mill
  • 1 1/2 teaspoon of baking powder
  • 1/2 teaspoon baking soda
  • 1/2 teaspoon kosher salt
  • 2 1/2 cups of mashed avocado
  • 2 tablespoons of lemon juice, fresh (about 1/2 a lemon)
  • 3/4 cup raw sugar
  • 1/2 cup greek yogurt, non fat plain (to make dairy free use soy or coconut yogurt)
  • 1 large egg
  • 1/8 cup of ground pistachios (optional)
  • Cooking spray

Pre work:

  • Preheat oven to 375 degrees.
  •  Cooking spray 3 mini bread loaf pans

1. Place the first 4 ingredients in a medium sized mixing bowl and whisk together. Set aside.

2. In a large mixing bowl place the avocado, lemon juice, sugar, yogurt and egg together and whisk to incorporates.

3. Add the dry ingredients to the wet and whisk together until no dry ingredients remain.

4. Place 1 cup plus 2 tablespoons into each mini bread loaf pan. Sprinkle with pistachio “crumbs”. 5. Bake at 375 degrees for 28 to 35 minutes. Or until toothpick comes out of the mixture clean.

Yields: 3 mini loaves

Salt & Pepper Cashews


IMG_0109

The holidays are here! That brings the cold weather. Friday was winter solstice the shortest day of the year. Warm up and bring in the holiday cheer with these spicy cashews.

I love making homemade gifts for the holidays. I made these for my mom and dad in mind. They love salt and pepper pistachios and I thought they would love salt and pepper cashews just as much since it is their favorite nut. These look super cute in mason jars with holiday trim or you can set out at your holiday party for the guests to snack on.

Ingredients :

1 tablespoon of canola oil

2 teaspoons of ground garlic & pepper blend ( or 1 teaspoon of ground garlic & 1 of ground pepper)

1 teaspoon of kosher salt

1 pound of raw cashew pieces ( Trader Joe’s is a good place to find nuts)

Directions

1. Heat a large sauté pan to medium heat. Add oil, spices, and salt. Let the spices heat and become aromatic. ( This takes about one minute). Continue to stir to prevent the spices from burning.

2. Turn the stove to low heat, add cashews and continue to stir for 4 minutes on low heat.

3. Remove from heat and let cool.

4. Once cooled completely place in air tight container. Fits perfectly in a pint mason jar.

Festive Peppermint Sugar Scrub

IMG_0072


The holidays are here. Where does the year go? This year I feel a little more behind than usual. However, this does not stop me from making holiday treats for the ones I love. I recently learned my love language is showing love through acts of doing; which explains why I love to make homemade goodies for the ones I love and appreciate.

I love making homemade goodies for Christmas. This year I went a little out of the norm for me and made a few non-edible gifts, like lip balm, body scrubs, and soaps. Please don’t be fooled I also made cookies (even macaroons!), and I will be making some breads for Christmas Eve. Once a baker, always a baker.

The last few years I have been all about starting new traditions with the ones I love and this year especially. In 2019, I hope to be posting more with many culinary adventures ahead with my love.

This recipe yields approximately :10 1/2 cups of sugar scrub. (As pictured from left to right you can place the scrub in 16 oz jars, 8 oz jars, or 4 oz mason jars. The top for the last 2 to the right is a holiday muffin tin cup, which I feel adds a little more holiday cheer).

Ingredients:

8 cups of granulated sugar, divided ( I found Aldi’s is the cheapest and right now it is $1.29 per 4# bag)

2 cups of coconut oil, divided

40 drops of peppermint essential oil, divided

20 drops of liquid red food coloring dye (optional)

Directions: 

  1. Using paddle attachment on your electric mixer beat 4 cups of sugar and 1 cup of coconut oil until fluffy. Add 20 drops of peppermint essential oil and mix a few more times. Set aside.
  2. In a separate mixing bowl add the remainder (4 cups of sugar, 1 cup of coconut oil and beat using a paddle attachment until light and fluffy. Add 20 drops of the essential oil and 20 drops of liquid red food coloring. Mix until you reach desired color and consistency.
  3. Portion out the scrub as you wish. I learned depending on the size jar you can use either a tablespoon or 1/8 to even 1/4 cup. I pushed down the scrub (with a small plastic [tupperware] dressing container) after each layer for a more ascetically pleasing appearance.

Special tip: Make sure to say yourself a jar. Take care of yourself this time of year and pamper yourself.


IMG_0071