Monthly Archives: April 2016

Muffuletta Pizza


One of my husband and I’s favorite vacations we went on was New Orleans in 2011. The culture in NOLA is very unique and welcoming. The food is amazing and like no other. We even attending a one of a kind cooking class at the New Orleans Experience to advance our skill-set on Creole Cooking.When we stayed in NOLA, we stayed at a wonderful Bed and Breakfast called Ashtons.  In the morning we had an elegant breakfasts and the hostesses even prepared vegetarian entrees for me. For the rest of the day we would scout out local restaurants to eat. One of my husband’s favorite new foods he consumed on the trip was a muffuletta sandwich. The ingredients on a muffuletta vary from where you purchase one; however, one element says the same there is always a marinated olive salad spread topping off the sandwich.  There is also some type of pork (ham, prosciutto, mortadella), beef (salami), & a cheese (provolone, swiss, mozzarella) on the sandwich.

Fridays are generally Pizza day at our home (homemade). Growing up Pizza Friday Night was always something I looked forward to as a kid. My mom would get us our favorite pizza and we would go next door to First Row Video and return a movie. It was the only day of the week we were permitted to have pop (and the way it should be), eat in the living room and watch TV at the same time. My husband’s family had a similar tradition with Pizza on Fridays, several years later, my husband and I still practice the tradition and look forward to the occasion.

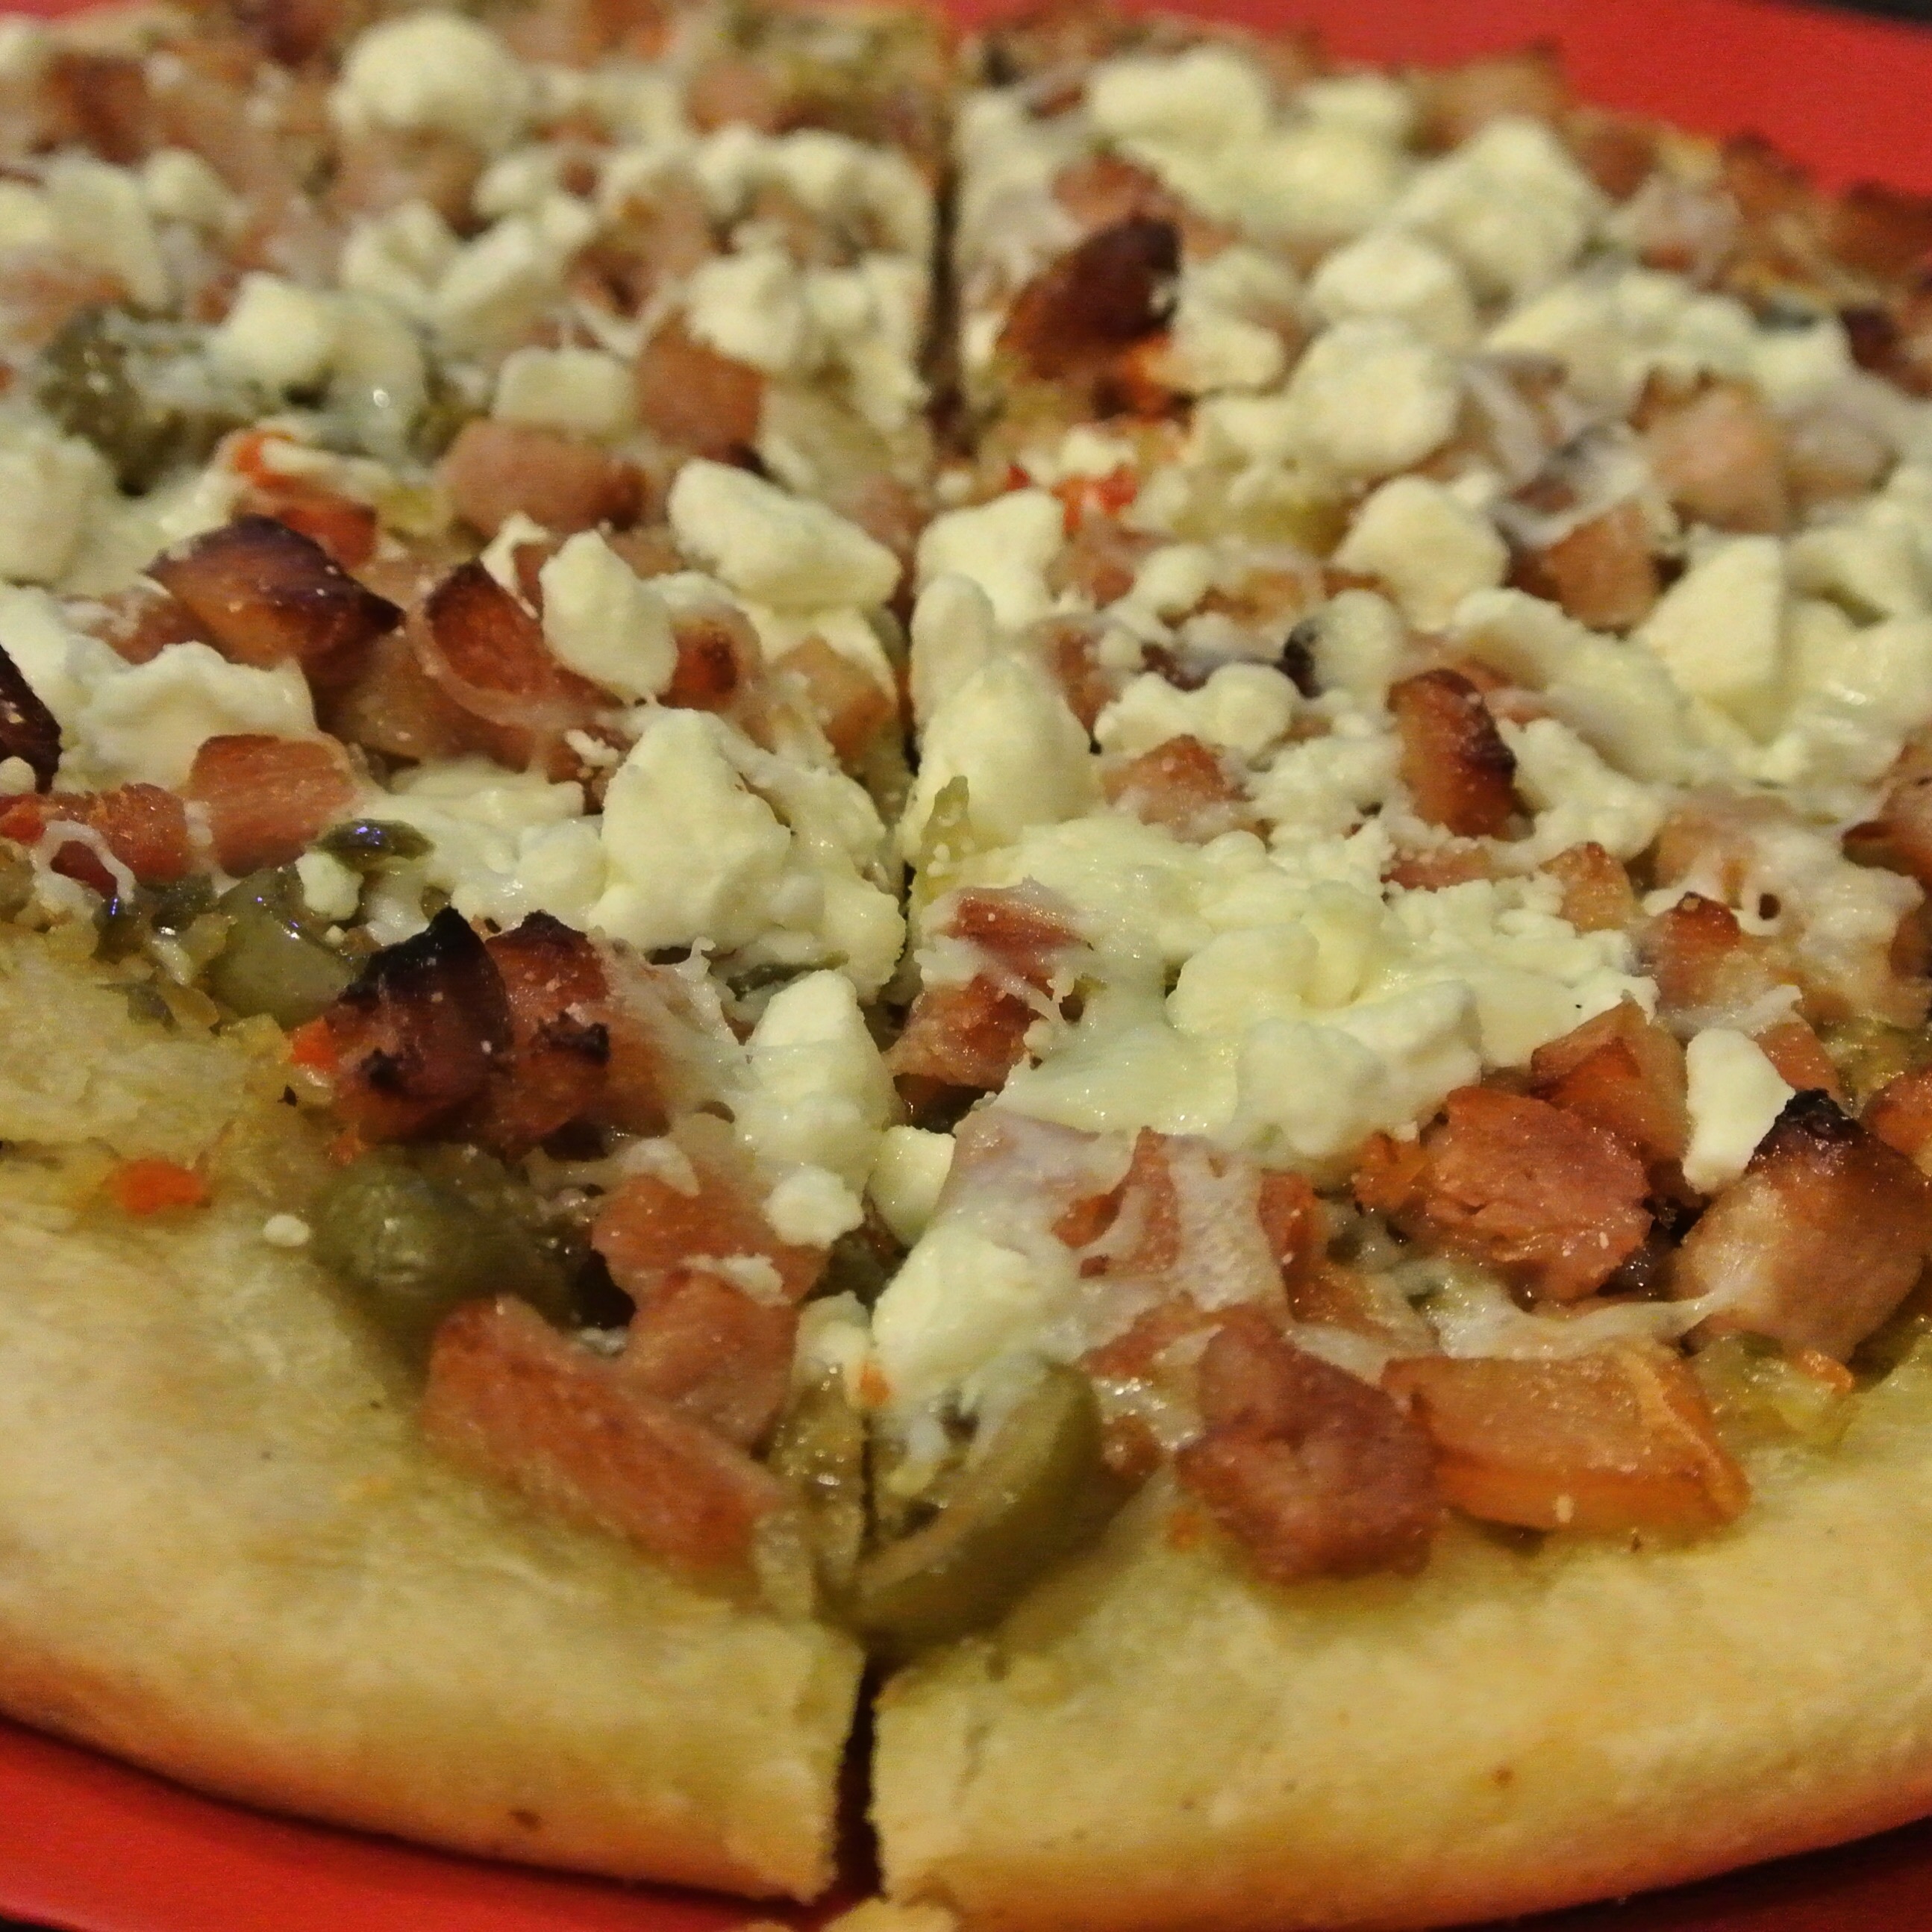
I have made several variations of muffuletta dishes from pasta to the traditional sandwich, maybe even some muffins. This is a new favorite and a way to honor the tradition of Pizza Friday and take my husband I back to NOLA without a plane ticket.

This pizza recipe yields six slices

Ingredients:

1 lb Pizza Dough, Fresh (link attached my our recipe) or store bought for $1-2 at the deli of the grocery store (If you are using frozen dough make sure to let it thaw in the refrigerator overnight). If using dough that has been in the refrigerator allow the dough to come to room temperature an hour before placing in the preheated oven.

2/3 cup of Jarred Muffuletta Mix

1 Cup of precooked diced ham

1/3 cup of Reduced Fat Feta Cheese, Crumbled

1/3 cup of Italian Blend Shredded Cheese

Directions:

  1. Preheat the oven to 500 degrees.
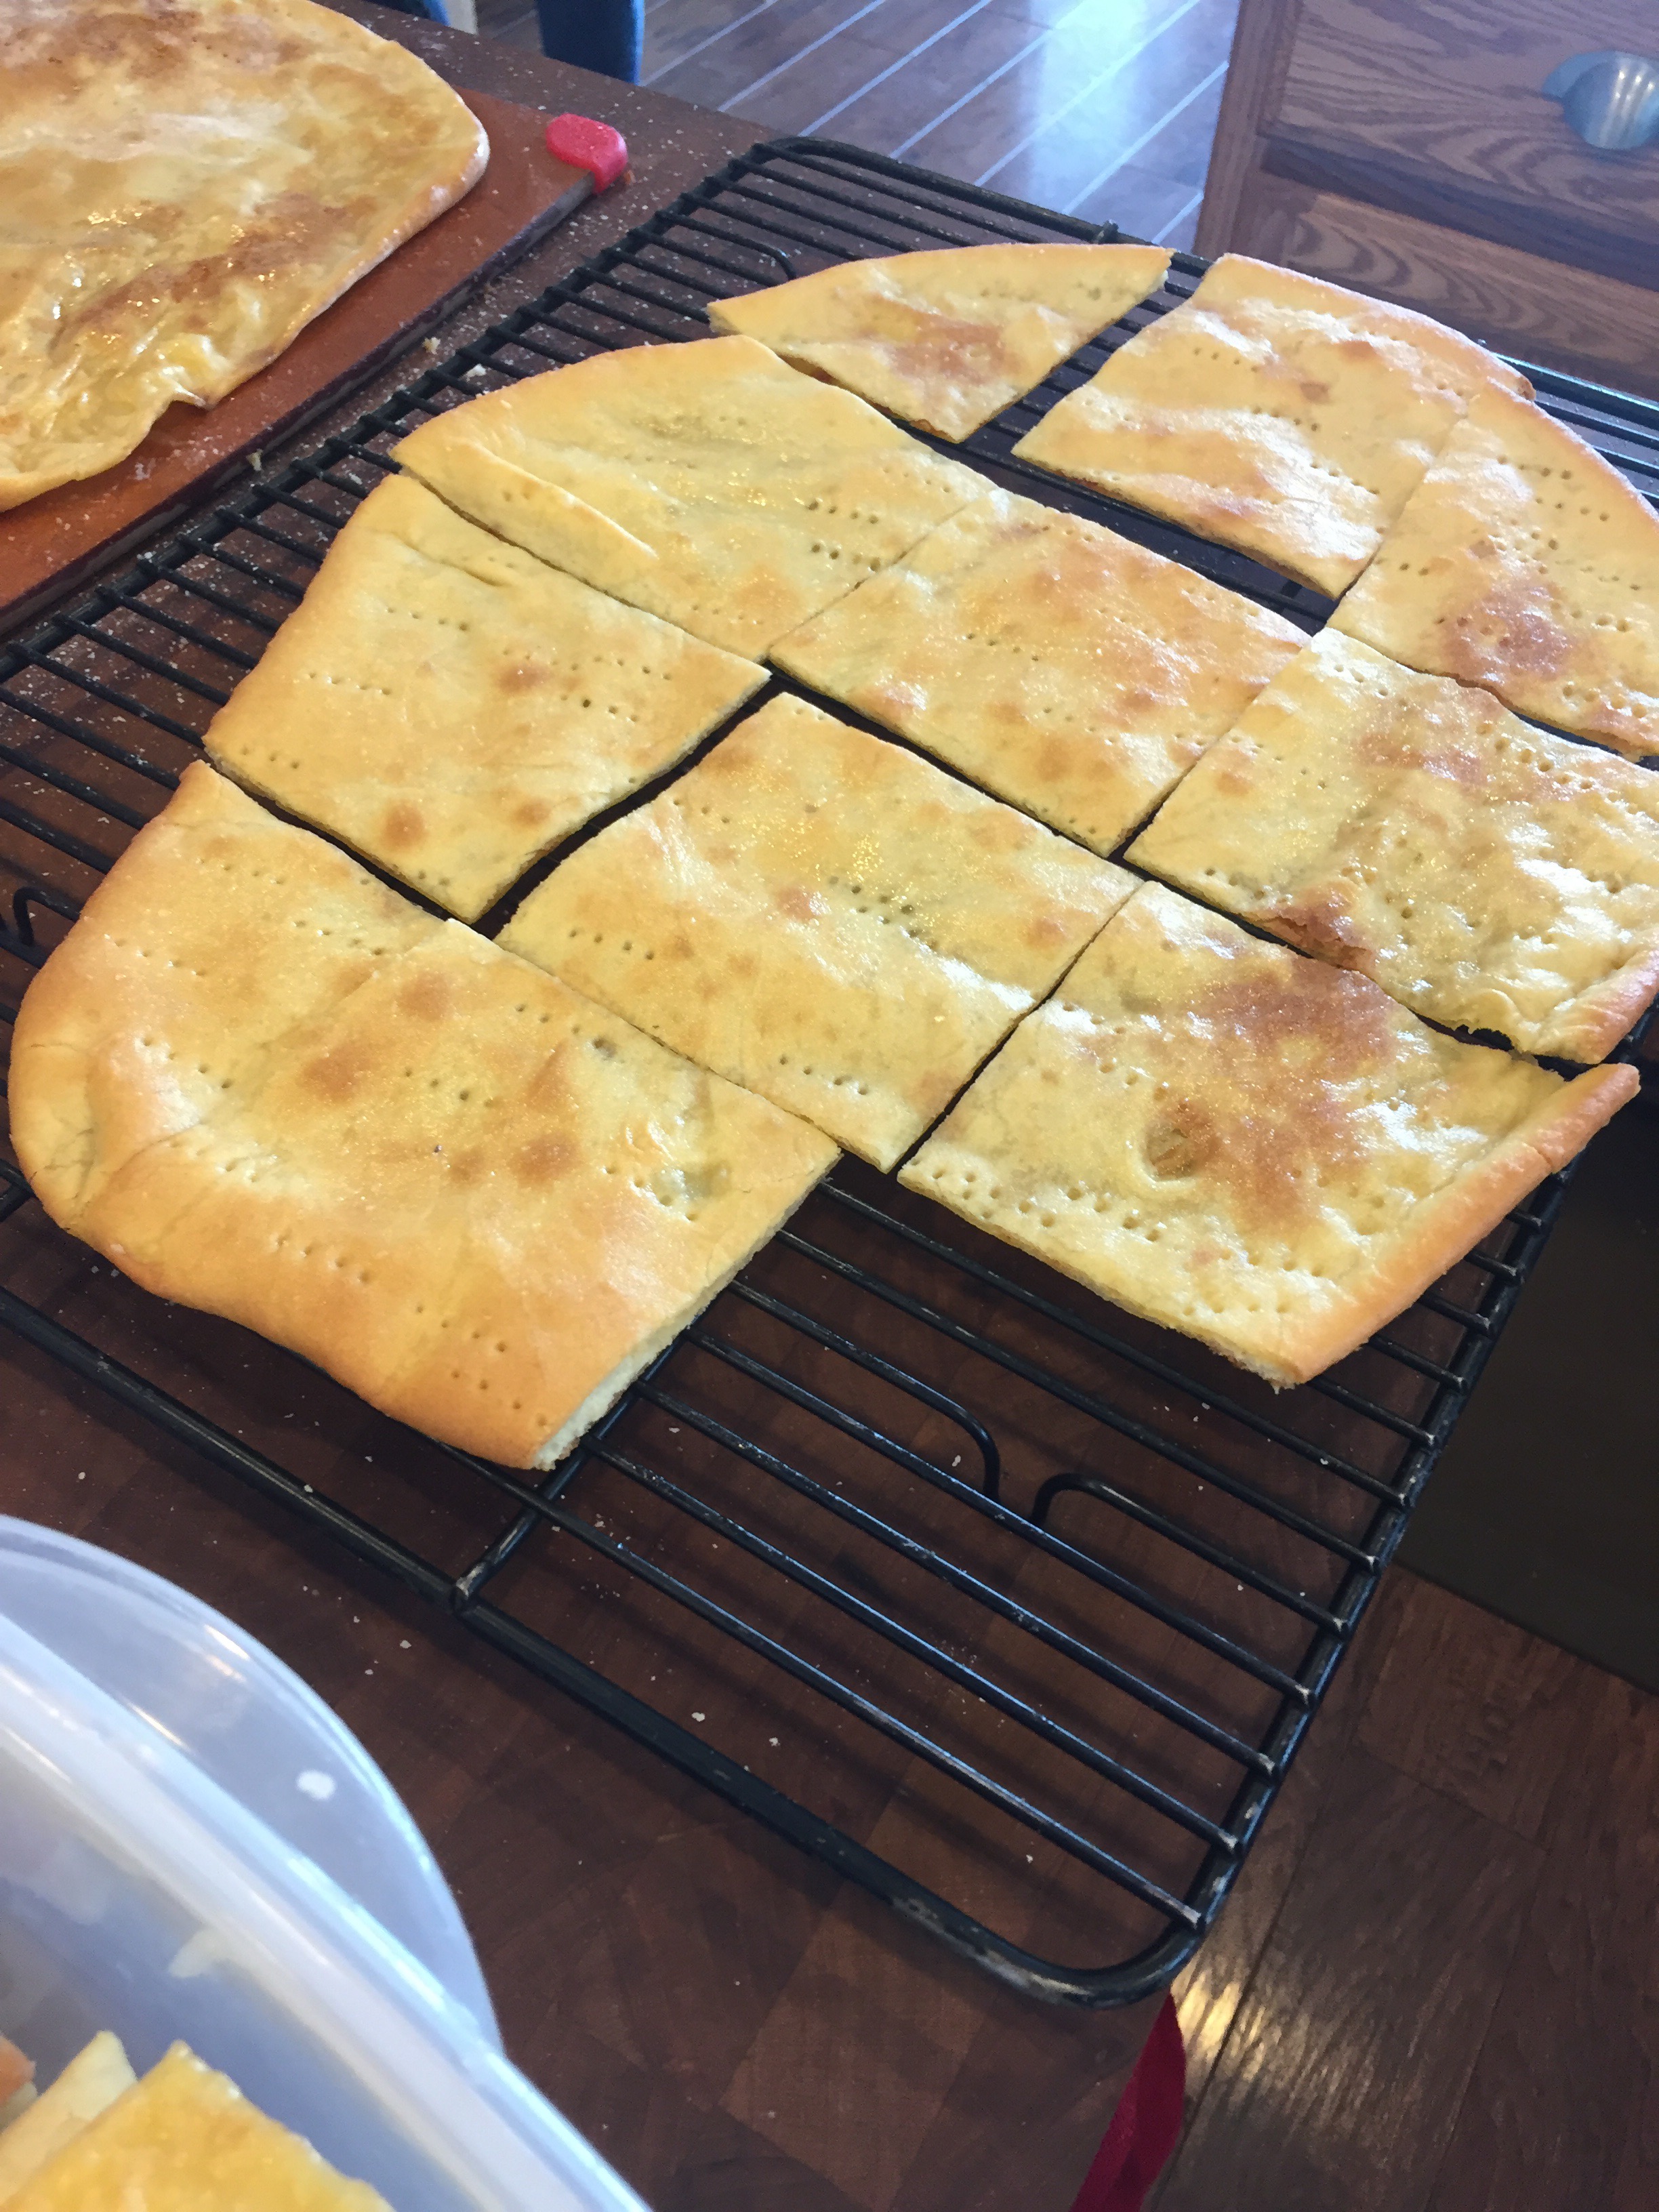
  2. Form the dough to fit a deep dish pizza stone. I like to roll my dough out and then press the dough into the dish. Once the dough is rolled out, gently place fork marks randomly to allow the steam to escape during the baking process. If you skip this step large bubbles may appear during the baking process.
  3. Once the dough is ready, place the muffuletta spread evenly on the dough leaving 3/4 of an inch boarder of the dough around the rim for the crust.
  4. Sporadically add the diced ham on top of the muffuletta spread. Place the pizza in the oven and allow it to bake at 500 degrees for 20 minutes.
  5. Remove the dish with oven mitts from the oven.  Sprinkle both of the cheeses on-top of the pizza evenly. Return the dish back into the oven to bake for 5 more minutes or until the cheese is melted. Remove from the pizza from the oven place on cutting board and cut pizza to your portion liking and serve.


Spring Pesto Pasta with Asparagus and Pine Nuts


If you are looking for a dinner that can be ready in 15 minutes than you have found the right recipe. Bonus you can make this entire dish in one pot! Whenever I’m in a hurry or in a pinch pasta is my go to for a quick and fast dinner. 

Asparagus is a spring vegetable packed with a lot of nutrition. Since this vegetable is in season right now you can get a pretty affordable deal at the market! I know our local farmers market has it fresh from the garden. 

Asparagus is rich in Vitamin K and also folate. Asparagus is also a good source of fiber. There are many colors of asparagus; however, the well know green asparagus is the most common variety, but you can also find white, & purple spears as well. 

Yields 4-6 servings 

Ingredients:

2 cups dry rotini (I used dreamfields)

1/2 tsp salt

3 oz of pesto ( I used my freezer stock from last season)

1 pound of fresh asparagus ( 2 inch segments)

1/4 cup pine nuts

Directions:

1. Cook the pasta according to package. During the last minute of boiling add the cut asparagus. Strain the pasta and asparagus. 

2. Add the noodles and asparagus back into the pan and add the pesto, salt and pine nuts. Use a spatula to mix the ingredients together and enjoy!

Mini Brownies


Tomorrow is Administrative Professional’s Day and I wanted to honor our department’s secretary by baking her some brownies. One of her favorite sweets is chocolate. There is no better way to satisfy a sweet tooth for chocolate other than rich chocolate brownies.


Ingredients:

1/2 cup of whole wheat pastry flour

1 tsp fine espresso powder

1 TB cornstarch

1/8 tsp baking soda

1/4 tsp kosher salt

3/4 dutch processed cocoa powder

1/2 cup of unsweetened applesauce

1/4 cup canola oil

2 eggs

1 tsp pure vanilla extract

1 cup of chopped chocolate (I used leftover Easter Chocolate)

Yields: 12 mini brownies

Directions:

  1. Preheat oven to 325 degrees. Generously spray with cooking spray an individual brownie pan ( I have the pampered chef product).
  2. In a large mixing bowl mix with whisk the applesauce, canola oil, vanilla, and espresso powder.  Add in the eggs, one at a time. Set aside.
  3. In a separate medium bowl sift together the flour, cornstarch, baking soda,  salt, and cocoa powder. Make sure to whisk everything together
  4. Add the dry ingredients into the wet ingredients. Use a spatula to fold and incorporate the ingredients. Lastly add the chucks of chocolate & fold to incorporate. 
  5. Portion out the batter into the individual cups and bake at 325 degrees for 15 minutes or until toothpick comes out clean.

Lemon Poppyseed Greek Yogurt Muffins

We are hostessing our second annual Mother’s Day Brunch in a few weeks. I have been searching and planning the menu to honor our moms. I think we are going to go with a refreshing mini muffin.

When my husband & I first started dating we would always go to this adorable one of a kind pastry cafes which served mini muffins. The restaurant would always plate the dishes with a surprise mini muffin. Lemon poppyseed was often the mini muffin that would accompany our entrees. This flavor also just happened to be one of our favorites. 

I thought I would trial these muffins in advance prior to our event. Spring is here even though temperatures dropped last night fairly low. My rhubarb is doing well with really big leaves. So recipes to come!!!!

 I plan on making mini muffins since we have quite the menu planned for our brunch; however, today I did bake a standard size muffin for breakfast.

 This recipe yields 15 standard muffins

Ingredients:

2 eggs 

2 TB poppyseeds

1/2 cup sugar

1/2 cup plain fat free greek yogurt

1/2 cup low fat buttermilk

1/2 cup unsweetened applesauce

1/4 cup canola oil

1/2 tsp pure vanilla extract 

2 TB lemon Juice, freshly squeezed

1 lemon, zested

2 cups of whole wheat pastry flour

1 tsp baking soda

1/4 tsp kosher salt

1 tsp baking powder

Directions: 

 1. Preheat the oven to 400 degrees. Generously coat with cooking spray a muffin tin. I did use my stoneware pan for this recipe which I highly recommend. 

2. Place the 1st 10 ingredients in a medium to large bowl. Whisk by hand the contents in the bowl to incorporate the ingredients together. Set aside.

3. In a seperate medium bowl mix the flour, salt, soda, & baking powder. 

3. Add the dry ingredients into the liquid batter. Be cautious not to over mix the batter. 

4. Using a size 16 scoop place one generous scoop in each of the muffin crevices. 

5. Bake the muffins in a preheated oven at 400 degrees for 14-15 minutes. When the timer goes off check the muffins with a toothpick. If no wet residue comes out of the muffin on the toothpick remove them from the oven.

6. Allow the muffins to rest in the tin for 1-2 minutes. 

7. Remove the muffins on to wire rack to allow to cool or serve warm!  enjoy!

Overnight Berry Oats


I don’t know what it is about a mason jar but it makes preparing breakfast the night before a lot more enjoyable. I love using mason jars for storage, canning, snacks, and now overnight oats. 

What I enjoy most, the jars are a fun way to see your creations come to life as they blend and marry in the refrigerator over night. 

This overnight oat recipe is very quick and easy to make and your belly will thank you in the morning. 

Ingredients

2/3 cup unsweetened cashew milk 

3/8 cup old fashion oats

1 tsp ground  vietnamese cinnamon

1/8 tsp pure vanilla extract

1/8 tsp coconut extract

1 tb slivered almonds

1 cup mixed frozen berries

1 packet of non caloric sweetener (optional) 

Directions:

1. Place the milk, oats,  sweetener, extracts, & cinnamon in pint mason jar and stir. Add the frozen berries and slivered almonds. Secure the lid and place the jar in the refrigerator overnight. 

2. The next morning stir the contents of the jar thoroughly! Enjoy ! 


Apple Maple Bacon Scones


Breakfast is my favorite meal to make or shall I say bake? Two weeks ago my husband and I went to the Beaver County Maple Syrup Festival at Bradys Run Park. This was our second year attending this show. The event has numerous venders for arts and crafts. The show also holds a large pancake breakfast (which get there early because there is always a long line). You can pretty much purschase anything maple flavored down to maple syrup cotton candy! Which by the way I had to purchase for my nephew. 

This year the festival was the first weekend in April. The event is usually the last week in March or first weekend of April. 

The best item to purchase is their local maple syrup and freshly ground whole grains. I love purchasing their cornmeal and buckwheat. There is nothing quite like freshly whole grains & pure maple syrup. 

Ingredients:

3/4 cup Buckwheat 

1 cup diced apples (peeled) (3 extra small)

3/4 cup diced fully cooked bacon

2 1/4 cup AP flour

1 TB baking powder

1 tsp kosher salt

1/2 tsp baking soda

1 tsp maple extract

3 TB pure maple syrup 

1/2 cup cold butter, diced

1/2 cup buttermilk

1 egg

Directions:

1. Preheat oven to 425 degrees. Line a half sheet pan with parchment paper, & set aside. 

2. In a medium glass bowl whisk flours, salt, baking soda, & baking powder.

3. Cut in the cold butter to the dry ingredients. Work the flour and butter with your fingers & hands until the texture is course and resembles wet sand. Set aside.

4. In a small bowl whisk the egg, buttermilk, maple syrup and extract. Add the liquid ingredients into dry and also the apple & bacon. Work the dough with a wooden spoon until all ingredients are moist. Be sure not to over mix. 

5. Place the dough on a heavily floured surface. I like to do this on parchment paper. Form the dough into a 14 inch circle, cut into 8 large scones. 

6. Place each scone on the prelined parchment paper. I was able to line all 8 on one sheet. Bake for 20 minutes at 425 degrees. 

7. Remove the scones from the pan and allow to cool on wire rack. Enjoy!


Pulled Pork Mac and Cheese

Mac and Cheese is a favorite in this house. I am always looking for ways to reinvent the wheel with this dish. This recipe was developed by having leftover pulled pork that my husband slow cooked on his smoker. I generally freeze the leftovers in small containers for pulled pork nachos, or enchiladas. And now every once and awhile pulled pork mac and cheese.

I made this dish for lunch last weekend when we were working on the belushi. I know my sister-in-law loves my mac and cheese. I even named the dish after her Julie and Josh’s Favorite Mac and Cheese.

Serves 4-6

Ingredients: 

  • 2 cups of dry. macaroni noodles (dreamfields or smart taste)
  • 2 cups plus 1/4 cup of 2% sharp cheddar cheese
  • 1 cup of shredded pulled pork
  • 1/2 cup egg substitute
  • 1/2  cup Fat Free sour cream
  • 1/2 tsp kosher salt
  • 1/2 tsp ground mustard
  • 1 cup of skim milk
  • 1/4 tsp pepper
  • 1/4 cup whole wheat bread crumbs, optional
  • BBQ Sauce, an add on right before serving

Directions:

  1. Preheat oven to 350 degrees.
  2. Spray and 8 by 8 glass dish with cooking spray.
  3. Cook macaroni according to the directions on the package.
  4. In the meantime measure out milk, sour cream, and egg substitute. Mix together with fork.
  5. Once cooked and drained place noodles back into the pan.
  6. Add the pulled pork to the pan and stir.
  7. Remove from heat.
  8. Add cheese and stir.
  9. Add liquid ingredient mixture, salt, pepper, and mustard. Fold until incorporated.
  10. Now pour noodles into the glass dish.
  11. Sprinkle with 1/4 cup of cheese & bread crumbs for an added flare.
  12. Bake for 30-35 minutes or until lightly golden brown.
  13. Top with BBQ sauce, about 2 TB on each piece of the Mac and Cheese.

Belushi


Today would have been my husband’s grandmother Nanny’s 91st birthday. She was such a wonderful lady. Nanny was always all about her family. Nanny showed her love like most mothers and grandmothers do by cooking and baking from the heart! One of her favorite things to make in the kitchen was Belushi. Her Belushi was always a family favorite. The bread never lasted very long at gatherings. Matter of fact you can never make enough to please everyone. This weekend we made three batches.

Belushi is a Slovakian dish. If you have never had this cheesy potato flatbread, you are truly missing out.  There is nothing quite like it. The flatbread is prepared with flour, yeast, sharp cheddar cheese, colby jack cheese and sprinkled with salt and slathered with butter. Everyone has an opinion as to when it tastes best. Most like it right out of the oven but some prefer it cold out of the refrigerator.

The traditional bread was not made all the time but as special treat. My mother-in-law mentioned to me the bread was baked more during the months of lent since it was rich in protein with the folding of the potato cheese blend. My mother-in-law states Nanny learned how to make this dish from her Grandma Anna Palonder. If you try to look up this recipe online there is nothing to be found. It truly is the Kessman special flatbread. 

Nanny gave me this recipe in 2007 for a wedding shower gift. My husband and I tried to prepare it my ourselves a few years ago and it did not turn out. Luckily this past weekend my husband’s sister came to town and give us the Kessman 411 on the family classic.


Servings: 90 servings

Ingredients:

1.5 lb Idaho Potatoes (pealed and quartered)

5.5 oz Sharp Cheddar Cheese (shredded)

5.5 oz Colby Cheese (shredded)

1 box of Hot Roll Mix

1 cup AP flour

1 1/4 cup warm water (like bath water)

1 tsp salt, plus more for dusting

1 egg

1 tsp sugar

2 TB Unsalted Butter, softened, plus more for brushing out of the oven


Directions:

1. The night before, boil the potatoes in a large stock pot for 15 minutes. Run the potatoes through a food mill. Place the potatoes in a large bowl. Add the cheese and mix thoroughly with wooden spoon. Cover and let cool in the refrigerator for 1 hour to overnight.

2.Preheat oven to 400 degrees. Take the potato cheese mixture out of the refrigerator and allow to come to room temperature.  Also line half sheet pans with parchment paper and set aside.

3. In the meantime work on the dough. Place the additional flour, sugar, & salt in a standing mixer along with the contents of the hot roll mix box. Use the dough hook attachment. Mix with stand mixer on low. Slowly add the warm water, egg, and softened butter. Gradually increase the speed to medium and allow the dough to form a ball (kneading with dough hook for 5 minutes). Cover with plastic wrap and allow to rest in warm area for 30 minutes.

4. Once the dough has risen evenly divide into 6 dough balls. On a heavily floured surface, roll out each dough ball into a 5 inch diameter. Place a generous scoop # 8 (4 oz) of the potato cheese mixture into the center of each circle. Wrap the dough around the cheese ball and pinch together the ends and place the sealed side down. Using a rolling pin, take the dough and roll it out on the heavily floured surface and roll the dough into a rectangular shape (large enough to fit a half sheet pan).  The flatbread should be very thin (1/4 of an inch or less, thinner the better!). Prior to placing in the dough in the oven take a fork and make random hole marks onto the dough to prevent the dough from bubbling in the oven.

5. Bake 2 sheets at a time in a preheated oven at 400 degrees for 10 minutes and flip the pans top to bottom halfway through and bake another 10 minutes.

6 Immediately remove the belushi to a cutting board and brush with pastry brush melted butter and season lightly with salt. Cut as you wish and enjoy!

DSC_1852


Thin Mint Coffee Creamer


Girl Scout season is here! Girl Scouts are everywhere selling cookies for one of their badges and to also allow the troops to complete activities throughout the year. 

Every time I see Girl Scout Cookie stands it is so hard to pass them up. They always talk you into a box or two…Even my husband the last time he went to the grocery store they conned him into a box. 

I was a Girl Scout when I was growing up and I can remember going door to door to sell these fine treats. One year I even found the mystery house one road off from my house. 

This creamer you can make all year round so you can enjoy the flavor anytime you have a craving for a thin mint. 

Ingredients:

2 cups of fat free half and half

1/2 cup of  Crème de menthe syrup

3 TB of penzeys hot cocoa powder

Directions:

Place all the ingredients into a sauce pan. Place pan on medium-high heat. Whisk with wire whisk so all the for ingredients can marry. Allow the creamer to simmer for 5 minutes and remove from heat. Allow the liquid to cool slightly prior to pouring into glass container. I recommend using a funnel for this step. Keep the vessel sealed in refrigerator. Make sure to shake the creamer well prior to each use. 

Vanilla Cake with Pastry Cream Filling & Strawberry Whipped Cream Frosting

My grandfather turned 86 years old this past weekend and I was honored to bake the cake for him. We were able to celebrate with some of our family at his favorite restaurant. We finished off the celebration with this refreshing spring cake.

Strawberries are one of his favorite fruits. My grandpa grows them in the summer and there is nothing, absolutely nothing that compares to his homegrown strawberries.

When my sister and I were kids we would go to his house and pick them fresh out of the garden. Two for me and one for the basket was our motto. We loved spending the summers at our grandparent’s home. Once we were finished we would have angel food cake, vanilla ice cream, & fresh sliced strawberries with some cool whip. Yum! I can taste the dish just thinking about it. This cake takes me back to those wonderful nostalgic memories at Grandma & Gtrandpa Harpers.


This cakes serves 16- 24 servings

Cake Ingredients:

3 cups cake flour
1 Tbsp baking powder
1/2 tsp kosher salt
1 cup (8 oz) (2 sticks)unsalted butter, room temperature
1 3/4 cup  granulated sugar
3 large eggs
2 large egg yolks
1 1/4 cups low fat buttermilk
2 tsp pure vanilla extract

Pastry Cream Filling:

3-4 Large Strawberries

1/2 cup skim milk 1/4 cup fat free half and half1/4 cup heavy cream
1/2 vanilla bean, split lengthwise, seeds scraped out
3 egg yolks
1/2 cup granulated sugar
1/8 cup cornstarch
1/2 tablespoon unsalted butter


Strawberry Cream Cheese Whipped Cream Ingredients:
1 1/2 cups heavy cream
1/2 cup powdered sugar, divided
4 oz cream cheese, 1/3 reduced fat, room temperature
1/2 tsp pure vanilla extract
1  lbs strawberries, hulled and sliced into pieces slightly under 1/2-inch
Sliced strawberries for decorating


Directions for the Cake:

Preheat oven to 350 degrees. Cooking spray with Bakers Joy (or a flour based spray) 3 9-inch round cake pans then line bottom with a round of parchment, cooking spray with Bakers Joy parchment. Set pans aside.

Whisk together flour, baking powder, and salt together into a medium mixing bowl, set aside.
In the bowl of an electric stand mixer fitted with the paddle attachment cream the butter and sugar until pale and fluffy. Mix in eggs and egg yolks one a time. Also add vanilla in with the eggs.  Add 1/3 of the flour mixture at a time (to the butter/egg mixture) alternating with 1/2 of the milk and mixing on low speed just until combined after each addition. Scrape down sides and bottom of bowl and gently fold batter several times.
Divide batter among prepared baking pans evenly. I like to use my scale for this, even distribution makes for even baking. Bake in preheated oven 20 minutes until toothpick inserted into center of cake comes out clean. Cool in pan about 5 minutes, run a plastic knife around edges of cake to ensure they are loosened then invert onto wire racks to cool for 20 minutes. After the time has elapsed prepare them for the freezer. I like to wrap them in plastic wrap and place them back into their baking pans and stack them in a deep freezer before frosting.

Directions for the Custard Filling:

In a small saucepan, heat the milk, heavy cream,  half and half, and vanilla bean to a boil over medium heat. Immediately turn off the heat and set aside to infuse for 10 to 15 minutes. In a bowl, whisk the egg yolks and granulated sugar until light and fluffy. Add the cornstarch and whisk vigorously until no lumps remain. Whisk in 1/4 cup of the hot milk mixture until incorporated. Whisk in the remaining hot milk mixture, reserving the empty saucepan. Cook over medium-high heat, whisking constantly, until thickened and slowly boiling. Remove from the heat and stir in the butter. Let cool slightly. Cover with plastic wrap, lightly pressing the plastic against the surface to prevent a skin from forming. Chill at least 2 hours before placing in between the layers of the cake.

Whipped Cream Frosting: 

In the bowl of an electric stand mixer fitted with the whisk attachment, whip heavy cream until soft peaks form (occasionally scrap down sides and bottom of bowl to ensure even mixing), add 1/4 cup powdered sugar and whip until stiff peaks form (make sure they are stiff or your topping will be runny, it should get to the point where it doesn’t have a wet sheen). Scrape cream out into a separate bowl.
Add cream cheese to bowl of stand mixer, fit with paddle attachment and whip cream cheese until smooth and fluffy, mix in remaining  1/4 cup powdered sugar and vanilla. Add strawberries and mix until uniform in color. Remove bowl from stand mixer, add whipped cream and fold into mixture.

Putting it all together:

Take the side with flat surface (the side that was touching the bottom of the pan) and place it onto cake plate or cardboard cake circle. Place a ring of the whip cream frosting around the border of the cake (I piped this by using a ziplock baggie & cutting a small rectangle at one of the tips of one of the corners) and then pour some of the custard into the center. Spread the custard evenly in the center. The ring of whip cream serves as a border to prevent spillage. Place slices of strawberries around the middle.


Place next cake layer down and repeat the custard layer with boarder of whipped cream. Top with the last cake layer.  Finish frosting by taking the remaining whipped frosting and frost cake. Place the cake in the freezer immediately and remove before serving.  Store leftover cake in an airtight container in refrigerator, well that is if there are any leftovers. We did not have any…